Tensorflow on Windows 10 – Sample Code

If you followed my previous blog posting, you should have your Windows Desktop or Laptop configured with NVIDIA CUDA and cuDNN. The last step is to test the installation and configuration of the NVIDIA CUDA and cuDNN libraries. On this post, we are going to use Tensorflow with Python to get the GPU information.

Tensorflow with Python

My preferred approach is to use Tensorflow with Python, it’s not as fast as C++ but it will validate the configuration.

The awesome folks at JetBrains have made a Community Edition of PyCharm IDE (My IDE of choice).

Here are the steps for a quick start.

  1. Install Python (use chocolatey package manager for Windows)
  2. Download PyCharm CE.
  3. Install PyCharm.
  4. Run PyCharm
  5. Create a New Python Project or Open an existing (Clone my github project)
  6. PyCharm will automatically create a virtueal env (venv), so install the libs in requirements.txt file.

You can also run the main.py file from the command line.

  • Open a terminal and navigate to the location of the project
  • Run :>pip install -r requrements.txt
  • Run :>python main.py

Output

Main.py Output

From the output of the main.py, we can see that the nvcuda.dll and the dynamic library from cuDNN are loaded successfully. If you missed a step or your $PATH is not setup correctly, the libraries will not be found.

The code ran on my laptop that has an NVIDIA GeoForce GTX 1650 TI, which you can see on the output image line #2. If I ran the code on a device with multiple GPU cards, then you will see the count to be more than 1.

The code has a sample ml model that it’s compiled, trained and evaluated. The ML Code is listed below.

Reference

Tensorflow install documentation:

https://www.tensorflow.org/install/pip

Sample Code from Tensorflow’s Beginner Docs (https://www.tensorflow.org/overview)

import tensorflow as tf
mnist = tf.keras.datasets.mnist

(x_train, y_train),(x_test, y_test) = mnist.load_data()
x_train, x_test = x_train / 255.0, x_test / 255.0

model = tf.keras.models.Sequential([
  tf.keras.layers.Flatten(input_shape=(28, 28)),
  tf.keras.layers.Dense(128, activation='relu'),
  tf.keras.layers.Dropout(0.2),
  tf.keras.layers.Dense(10, activation='softmax')
])

model.compile(optimizer='adam',
              loss='sparse_categorical_crossentropy',
              metrics=['accuracy'])

model.fit(x_train, y_train, epochs=5)
model.evaluate(x_test, y_test)

Tensorflow on Windows 10 with GPU Support – Part 3

This is the final post on getting your windows 10 desktop/laptop ready with Tensorflow (GPU Enabled). The main take away here is that after you install the NVIDIA CUDA SDK, you must install cuDNN version 8.2.2 for CUDA 11.4. Make sure that you select the version of cuDNN that supports your CUDA install.

Download cuDNN

Login or create a developer account at https://developer.nvidia.com/. Once you log in, go to NVIDIA Developer resources. The link to download cuDNN follows:

https://developer.nvidia.com/rdp/cudnn-download and click on the link for your system.

NVIDIA has done a great job with their documentation, so I am going to point you there so that you get the installation guide.

https://docs.nvidia.com/deeplearning/cudnn/install-guide/index.html#installwindows

Optional – Compile the samples and run them.

Congratulations! Your system is ready to run Tensorflow. I have one more post which has python code that validates if Tensorflow can use the GPU. Stay tunned and happy Tensorflowing…

Tensorflow on Windows 10 with GPU support – Part 2

This is the second part of a three part series on installing and configuring Tensorflow on Windows 10 with GPU.

If you have not done so, take a look at part 1 and double check that you have the required components. Part 1

Install NVIDIA CUDA Toolkit

Now you are ready to install the CUDA toolkit. Go to the NVIDIA website and download the CUDA toolkit.

Select the your OS and download the toolkit.

Next, navigate to the download location and double click on the .exe file. You should see the installer window leave the default Temp folder, this will be deleted when the installer is done.

NVIDIA Installer

Click Ok. And you should see the progress bar window.

Extraction Progress Bar

When the CUDA setup is complete, you will get the installer wizard. Read the EULA and click on Agree and Continue.

License Agreement

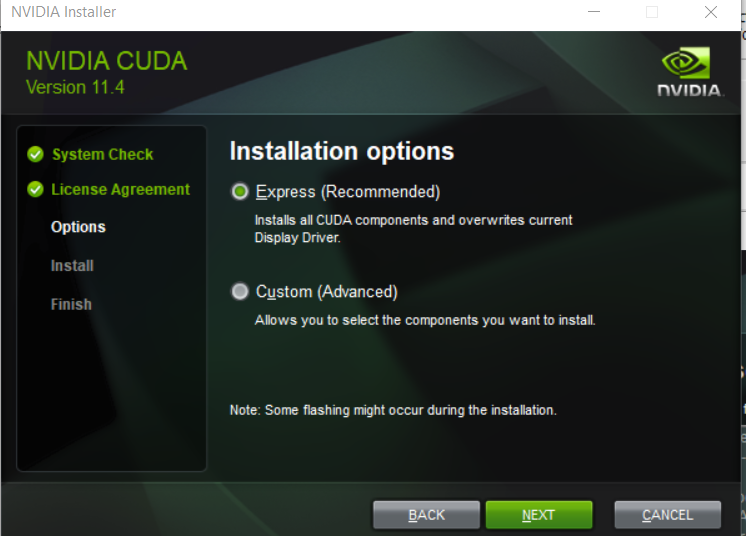
Next, we select the express installation option. Express and Click Next.

Installation Option

Remember in Part 1 that we needed to install Visual Studio 2019? If you missed that step, here’s the error message that you will see.

Error Code

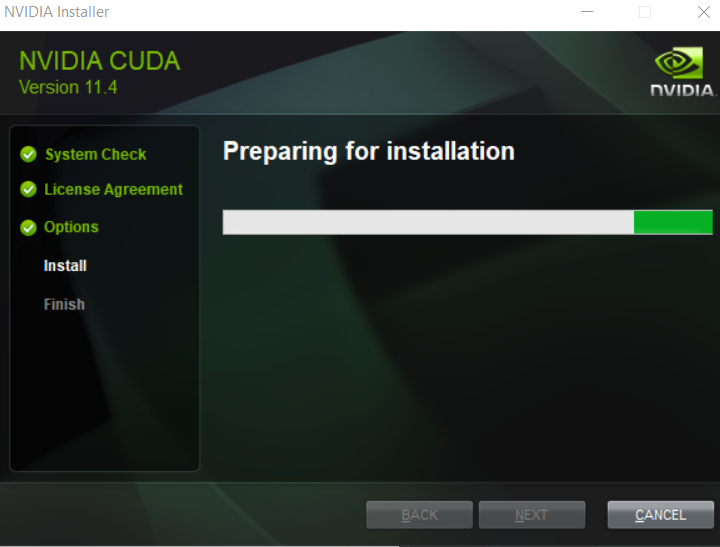
The next window “Preparing for Installation”.

Preparing Installation

NSight installation summary.

NSight Installation

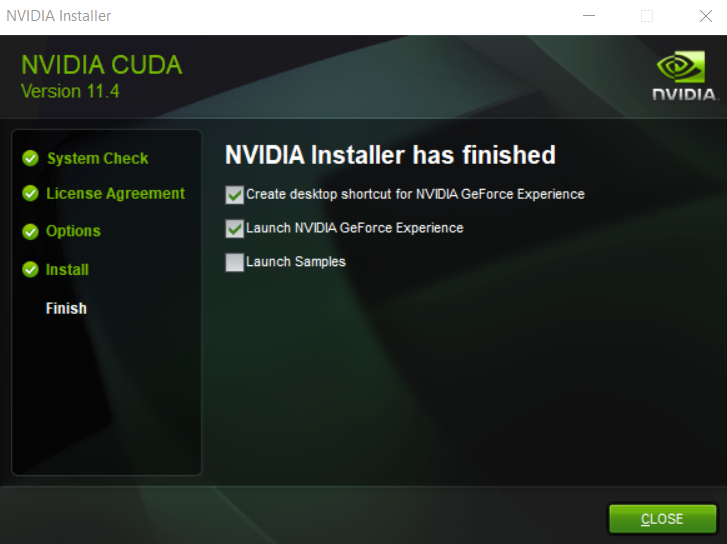
Installation is complete….

Installation Summary

I chose not to run the examples, but if you have time I recommend running a couple. On our next post, we will install cuDNN.

Tensorflow on Windows 10 with GPU Support – Part 1

This is the first part of a three part series on installing and configuring Tensorflow with Keras on Windows 10. We will also enable GPU support.

First, we need to install the Microsoft Visual Studio Toolkit. Then, we install the NVIDIA CUDA Toolkit. Finally, we install the NVIDIA cuDNN. Also, we need python 3.x installed and your favorite python IDE (PyCharm). Let’s jump right in and get started.

Installing Microsoft Visual Studio CE

Click on the link below to download Visual studio. Then follow the instructions on installing the software.

Download Visual Studio 2019 for Windows & Mac (microsoft.com)

Navigate to the directory containing the .exe file and double click to get the installer window.

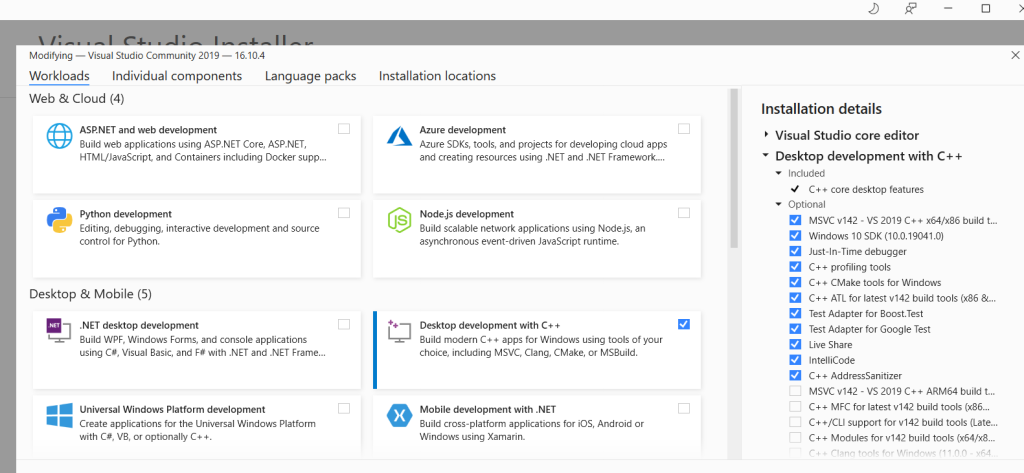
The initial installation window asks you to select which components to install.  Select the C++ option and any others that interests you.  I use Visual Studio Code for everything except Python, so my install was light weight.

The installer progress bar…

Once the installation is complete, you will get a window to login to Microsoft.

Sign in, select the theme that you like and click on the Start visual studio button.

Congratulations, you have completed the first of three posts.

Q&A

Why do I have install Visual Studio 2019? NVIDIA CUDA Toolkit requires Visual Studio. If you have another version of Visual Studio the CUDA installer should not throw an error.

Ubuntu 17.10 & NVIDIA Driver Support

Good news everyone!  Ubuntu 17.10 provides support for the NVIDIA Drivers out of the box.  I was not able to get the latest driver, 390.25 with CUDA Toolkit version 9.1 to work properly on my Notebook (Lenovo W541).  However, I was able to get a previous version of the  NVIDIA driver version 384.111 with Cuda 9.0 on Ubuntu 17.10 working!

Install the NVIDIA Driver

My PC –  Lenovo W541, 32 GB RAM, CORE i7 processor and NVIDIA Quadro K1100M.  The trick is to get the driver and cuda toolkit versions to work together.  This blog provides insight into what the setup constitutes.

  1. Determine the type of NVIDIA Graphics cards that your notebook/pc has.
    • execute the following command: > lspci | grep VGA.  You should see your NVIDIA Graphics card model. lspci_vga.png
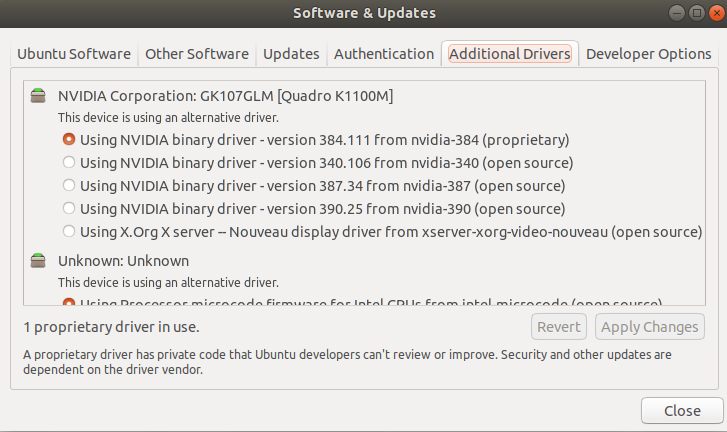
  2. Start the Ubuntu “Software and Updates” application.  Then, click on the “Additional Drivers Tab”.  Give it a several seconds to load.Software_Updates.png
  3. Select the NVIDIA binary driver – version 384.11 (proprietary).  This, step will take sometime.
  4. Once the install is complete, reboot your machine.
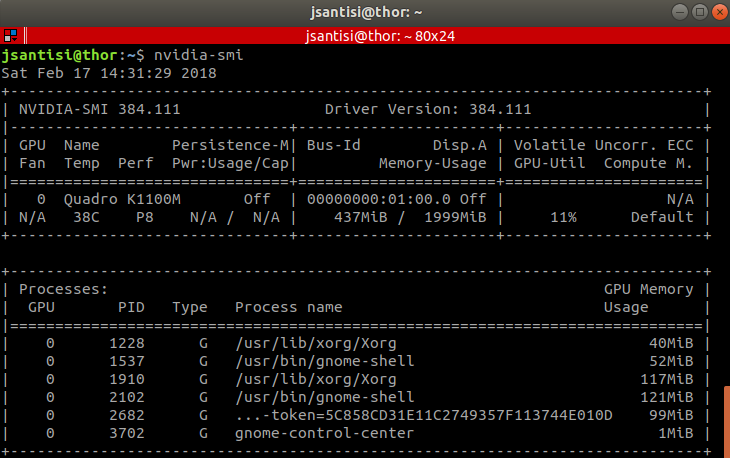
  5. Check that the driver was installed by running the following command.
    • :>nvidia-smi nvidia-smi.png

On the top of the image you can see the version of the NVIDIA Driver, 384.111.  Also, you can see the processes that are using the NVIDIA driver.

Installing the CUDA Toolkit 9.0

CUDA 9.0 toolkit needs GCC version 6.  By default Ubuntu 17.10 comes with GCC version 7.  Not to worry, update-alternatives comes in to save the day.

Install GCC version 6 and update alternatives.

  1. sudo apt install gcc-6
  2. sudo apt install g++-6
  3. sudo update-alternatives –install /usr/bin/gcc gcc /usr/bin/gcc-6 10
  4. sudo update-alternatives –install /usr/bin/g++ g++ /usr/bin/g++-6 10

Download the CUDA toolkit from the NVIDIA site.

:>wget https://developer.nvidia.com/compute/cuda/9.0/Prod/local_installers/cuda_9.0.176_384.81_linux-run

Make the download executable and run it as sudo.

:>chmod +x cuda_9.0.176_384.81_linux-run

:>sudo ./cuda_9.0.176_384.81_linux-run –override

The installer will complain about an unsupported installation.  It’s ok – follow these steps.

CUDA Installer Q&A

You are attempting to install on an unsupported configuration. Do you wish to continue?
y
Install NVIDIA Accelerated Graphics Driver for Linux-x86_64 387.xx?
n
Install the CUDA 9.0 Toolkit?
y
Enter Toolkit Location
[default location]
Do you want to install a symbolic link at /usr/local/cuda?
y
Install the CUDA 9.0 Samples?
y
Enter CUDA Samples Location
[default location]

Check your installation by running the following command:>nvcc -V

nvcc.png

If you see the CUDA compiler driver, you did it!

Congratulations! You have installed the CUDA Toolkit.  Now let’s move on to the CUDA Configuration section of this blog.

CUDA Configuration

The CUDA toolkit provides plenty of samples to build and test the NVIDIA GPU.  Now that you install the driver, make sure to set the PATH with the cuda binaries.

open your ~/.bashrc file and add the following line at the end of the file:

export PATH=$PATH:/usr/local/cuda-9.0/bin

Next, you need to add the CUDA libraries to your environment.  This step saves you time when compiling CUDA samples or code. You don’t have to set the LD_LIBRARY_PATH.

  1. sudo vi /etc/ld.so.conf.d/cuda.conf
  2. add the following to the top of the file:/usr/local/cuda-9.0/lib64
  3. save the file and quit vi
  4. sudo ldconfig

In theory, you are ready to run the CUDA samples.  However, I found that in order to run the Simulations, that you need to install the following dependencies.

sudo apt install libeigen3-dev libopencv-dev libceres-dev libcgal-dev libboost-dev freeglut3-dev build-essential libx11-dev libxmu-dev libxi-dev libgl1-mesa-glx libglu1-mesa libglu1-mesa-dev libglfw3-dev libgles2-mesa-dev

Now you are ready to run the samples!

Running CUDA Samples

Before running the samples, you need to pass the Gencode arguments to the compiler.  Here’s a great blog to help you figure out which Gencode arguments to pass to the compiler.

Navigate to the ~/NVIDIA_CUDA-9.0_Samples directory.  There are 8 directories that contain NVIDIA CUDA Samples (0-7).

Go into the following directory:> cd ./CUDALibraries/cuSolverDn_LinearSolver 

Open the Makefile.

Search for “SM”.  You should see the following.

gencode.png

You don’t need all the codes, just the one that applies to your NVIDIA Graphics card.  In my case, I don’t see the Quadro K series, so I used gencodes 50 & 52.

Once you are done with the Gencode Arguments, save the file and exit the editor.

From the command line:

  1. make TARGET_ARCH=x86_64
  2. run the program: $ ./cuSolverDn_LinearSolver

final.png

Try running the smoke particles example in the directory 5_Simulations.