Good news everyone! Ubuntu 17.10 provides support for the NVIDIA Drivers out of the box. I was not able to get the latest driver, 390.25 with CUDA Toolkit version 9.1 to work properly on my Notebook (Lenovo W541). However, I was able to get a previous version of the NVIDIA driver version 384.111 with Cuda 9.0 on Ubuntu 17.10 working!
Install the NVIDIA Driver
My PC – Lenovo W541, 32 GB RAM, CORE i7 processor and NVIDIA Quadro K1100M. The trick is to get the driver and cuda toolkit versions to work together. This blog provides insight into what the setup constitutes.
- Determine the type of NVIDIA Graphics cards that your notebook/pc has.
- execute the following command: > lspci | grep VGA. You should see your NVIDIA Graphics card model.

- Start the Ubuntu “Software and Updates” application. Then, click on the “Additional Drivers Tab”. Give it a several seconds to load.
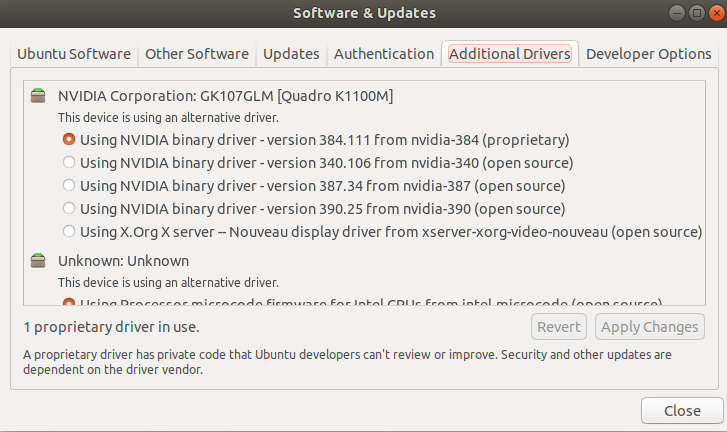
- Select the NVIDIA binary driver – version 384.11 (proprietary). This, step will take sometime.
- Once the install is complete, reboot your machine.
- Check that the driver was installed by running the following command.
- :>nvidia-smi
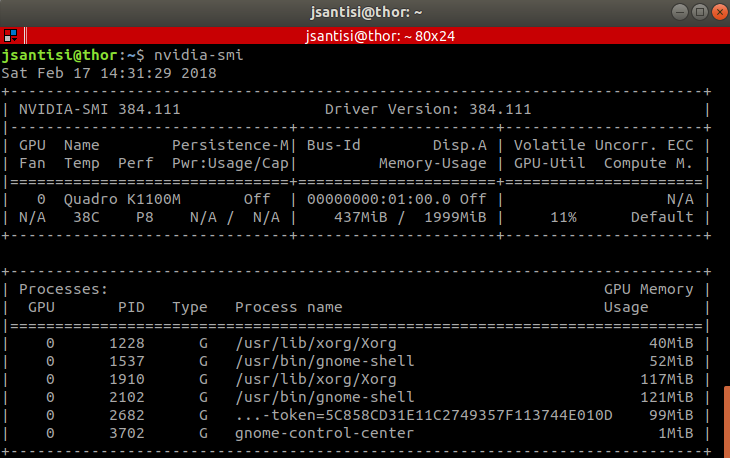
On the top of the image you can see the version of the NVIDIA Driver, 384.111. Also, you can see the processes that are using the NVIDIA driver.
Installing the CUDA Toolkit 9.0
CUDA 9.0 toolkit needs GCC version 6. By default Ubuntu 17.10 comes with GCC version 7. Not to worry, update-alternatives comes in to save the day.
Install GCC version 6 and update alternatives.
- sudo apt install gcc-6
- sudo apt install g++-6
- sudo update-alternatives –install /usr/bin/gcc gcc /usr/bin/gcc-6 10
- sudo update-alternatives –install /usr/bin/g++ g++ /usr/bin/g++-6 10
Download the CUDA toolkit from the NVIDIA site.
:>wget https://developer.nvidia.com/compute/cuda/9.0/Prod/local_installers/cuda_9.0.176_384.81_linux-run
Make the download executable and run it as sudo.
:>chmod +x cuda_9.0.176_384.81_linux-run
:>sudo ./cuda_9.0.176_384.81_linux-run –override
The installer will complain about an unsupported installation. It’s ok – follow these steps.
CUDA Installer Q&A
You are attempting to install on an unsupported configuration. Do you wish to continue?
y
Install NVIDIA Accelerated Graphics Driver for Linux-x86_64 387.xx?
n
Install the CUDA 9.0 Toolkit?
y
Enter Toolkit Location
[default location]
Do you want to install a symbolic link at /usr/local/cuda?
y
Install the CUDA 9.0 Samples?
y
Enter CUDA Samples Location
[default location]
Check your installation by running the following command:>nvcc -V
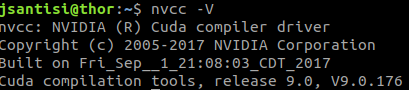
If you see the CUDA compiler driver, you did it!
Congratulations! You have installed the CUDA Toolkit. Now let’s move on to the CUDA Configuration section of this blog.
CUDA Configuration
The CUDA toolkit provides plenty of samples to build and test the NVIDIA GPU. Now that you install the driver, make sure to set the PATH with the cuda binaries.
open your ~/.bashrc file and add the following line at the end of the file:
export PATH=$PATH:/usr/local/cuda-9.0/bin
Next, you need to add the CUDA libraries to your environment. This step saves you time when compiling CUDA samples or code. You don’t have to set the LD_LIBRARY_PATH.
- sudo vi /etc/ld.so.conf.d/cuda.conf
- add the following to the top of the file:/usr/local/cuda-9.0/lib64
- save the file and quit vi
- sudo ldconfig
In theory, you are ready to run the CUDA samples. However, I found that in order to run the Simulations, that you need to install the following dependencies.
sudo apt install libeigen3-dev libopencv-dev libceres-dev libcgal-dev libboost-dev freeglut3-dev build-essential libx11-dev libxmu-dev libxi-dev libgl1-mesa-glx libglu1-mesa libglu1-mesa-dev libglfw3-dev libgles2-mesa-dev
Now you are ready to run the samples!
Running CUDA Samples
Before running the samples, you need to pass the Gencode arguments to the compiler. Here’s a great blog to help you figure out which Gencode arguments to pass to the compiler.
Navigate to the ~/NVIDIA_CUDA-9.0_Samples directory. There are 8 directories that contain NVIDIA CUDA Samples (0-7).
Go into the following directory:> cd ./CUDALibraries/cuSolverDn_LinearSolver
Open the Makefile.
Search for “SM”. You should see the following.

You don’t need all the codes, just the one that applies to your NVIDIA Graphics card. In my case, I don’t see the Quadro K series, so I used gencodes 50 & 52.
Once you are done with the Gencode Arguments, save the file and exit the editor.
From the command line:
- make TARGET_ARCH=x86_64
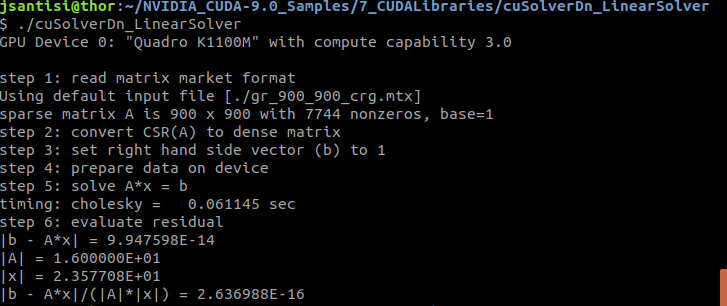
- run the program: $ ./cuSolverDn_LinearSolver
Try running the smoke particles example in the directory 5_Simulations.